Saturday 16 March 2013

Another Flower Pot Card.


I love this card design. I used it once before for a class that I ran in a different colour way and enjoyed the chance to try out THIS tutorial on SplitCoastStampers again. SCS is a great resource for projects and ideas using Stampin' Up! Stamps and Products, and there are galleries dedicated to almost EVERY SU stamp set you can imagine showcasing other peoples beautiful handiwork If you've not looked at the sight before, check it out: you're missing an invaluable treat!
For the flowers I used the gorgeous Mixed Bunch stamp set, in Daffodil Delight, Cherry Cobbler, and Pool Party (which doesn't show up very well in the picture but looks so pretty in real life!) The pot is made from Soft Suede and tied with Cherry Cobbler Seam Binding Ribbon. This was a card for a green fingered friends birthday, but it would work equally well for any number of occasions especially with Easter just around the corner:) I'm thinking next time about trying out some ribbon flowers instead of stamped ones. We'll see how that goes.

Tuesday 12 March 2013

Princess Bunny Birthday.


A Punch Art Bunny Princess to celebrate a sweet girls birthday. Lili you are growing up too fast! 

I followed THIS basic tutorial to make the bunny but changed it up a bit to work with the punches that I had, using the Scallop Oval Punch for the ears and feet. I don't really make Easter cards, not sure why, but I had to have a reason to make this gorgeous little bunny. My niece was having a Princess Party for her birthday and as I made a Princess card last year I wasn't sure what to do, but hey; add a tiara and voila! You have a Princess Bunny:))) I punched the tiara out of a sheet of Champagne Glimmer Paper, then added a few diamante's its a shame they don't really show up in the picture.

  I'm sure over the next few years I will need to 'Princessify' a few more punch art animals in order to meet the young Disney lover's birthday card needs!

Oh and welcome back to the snow. You've got to love England, always keeping you on your toes! This time last week it looked like summer was well on its way, and now my poor daffodils are all lying dead in the snow and the extra quilt is back on the bed. little Miss and I felt grumpy and rough today so i made the decision we were 'snowed in' and had a pajama day and snuggled on the couch watching films. You just can't beat little girl snuggles.   


post signature

Saturday 9 March 2013

To My Sweet Mother

Each year I find it hard to know what to write in my Mother's Day card, how do you sum up 30 years of gratitude and love in a few lines? You can't can you, really. Poets and card companies have been trying for years, some more successfully then others! I hope she knows though, just how thankful for her and the life she gave to me. I hope I show her through my actions, which I think means more then a card year after year.

For this years card I went for a garden theme, the idea was that the letters were the flowers growing out of the pots. I used the scallop oval punch cut in half and inked around the edges to make the pots, the grass was made using the scallop edge punch, then I cut wedges into the tops to make it grassy. Adding a few butterflies cut with the Beautiful Wings embossilit die stopped the card from looking too bare and I finished it with a little ribbon tied around the base, Madison Ave, Island Indigo Ribbon (from the Sale a Bration set) on one card and Stitched Summer Starfruit ribbon on the other card.


Friday 1 March 2013

Henry Says "Happy Birthday Jack!"

It's my Nephew's birthday today. Happy Birthday Jack! Seems just like yesterday I was posting the Pokemon Card I made for his last birthday! This year apparently he is mad on Moshi Monsters(????) I know I should Google it but I haven't got the first clue really, though it's about time there was a craze going around that wasn't a craze when I was younger as well! Anyway, pleading ignorance I thought I would test run my brand new 'Henry Says' stamp set from the Spring/Summer Catalogue. I stamped Henry on some of the Madison Avenue DSPapaer (that you can get FREE through the Sale-a-bration promotion.) Then I 'fussy' cut around the outline and raised him up from the card surface using Dimensionals.
  I like having a funky patterned Elephant, it makes me think of Elmer, or those trippy elephants that show up in Disney cartoons so often:) and he makes me smile, which can't be a bad thing. I hope it makes the Birthday Boy smile as well.

Monday 25 February 2013

Bloomin' Marvelous


Here is a cute little set of 3"x3" cards that I whipped up last night. It may be -1•c outside but I am full of the joys of spring, so I wanted to choose some equally fresh, spring-like colours for this project. I opted for Daffodil Delight, Lucky Limeade, and Regal Rose in card stock and ink, don't they look pretty together!? The stamp set is Bloomin' Marvellous and is one of the gorgeous Sale-a-Bration sets on offer this year. The finishing touches were some bakers twine, itty bitty flowers and a few Basics Pearls. The cards come together so quickly they would be perfect for a quick gift or if you need a few cards in your bag, for emergencies.


Wednesday 13 February 2013

My Sweet Valentine

I finally had five minutes to myself this evening. Whenever I make plans that involve doing things without my husband being here to find out, he inevitably comes down with a devastating strain of man flu which has him lolling around the house getting under my feet and feeling very sorry for himself! So tonight I had to grasp the time I had to myself to quickly construct my poorly sweet heart a valentines card. I hope he likes it!

Tuesday 5 February 2013

A Party to Remember!

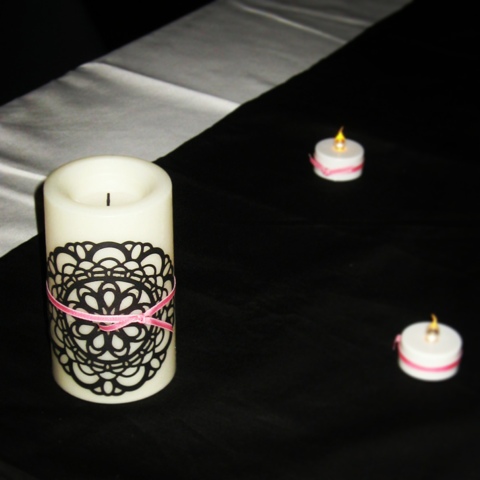
I am finally getting around to putting up a post about my Mum's 60th Party; that took up so much of my time and attention over the last few months! I will let the pictures do most of the talking! Ironically for a Stamping Blog; it completely slipped my mind to take a single picture of the ready made scrap book that I made up for Mum to record the night in. I made up 20 double sided pages in the colours of the night; black, white, and pink, and decorated them with die cuts, brads and pretty ribbons, so the pages were all ready to add pictures and mementos of the night.


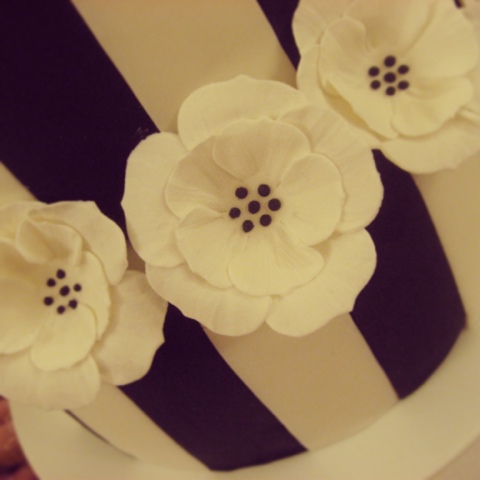
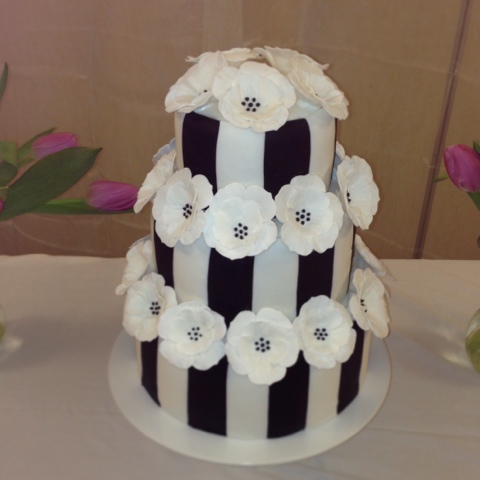
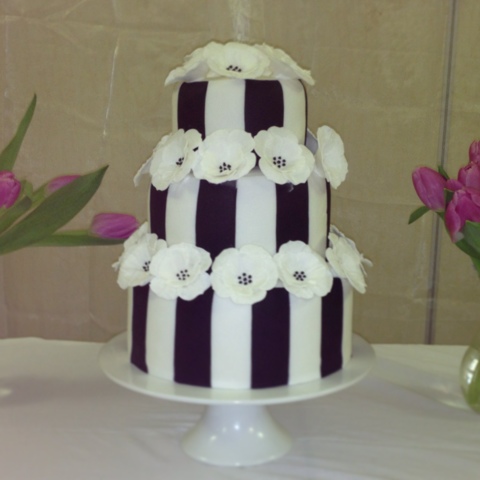
The cake was a task in its self being a 3 tier job with 30 handmade dog roses. Getting it made in time with a very active and demanding 1 1/2 yr old, was nothing short of a miracle. I went for a different cake flavour for each tier. Victoria sponge for the top, Lemon sponge with lemon curd for the middle( my favorite) and Chocolate with chocolate ganache for the bottom. For my first attempt at a tiered cake I have to admit to being pretty chuffed with the results and they're all thanks to the wonderful step by step directions in the Peggy Porschen book 'Romantic Cakes'. Her Cakes, and her books are exquisite and such an inspiration to me. I own all of her books and often flick through them for inspiration or just to admire the beauty and there are some excellent 'Go-to' recipes. I remember Mum seeing it in the book when I was flicking through it with her just after I bought; it and saying how lovely it was so I made a mental note ( always a forward thinker!) and just knew this cake would be what I would be cracking out for her 60th. She deserved something spectacular!
 

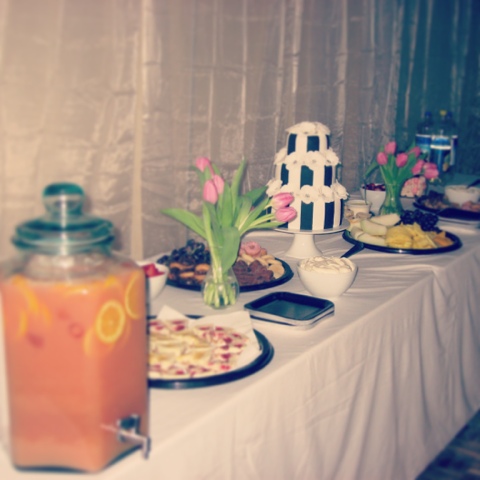
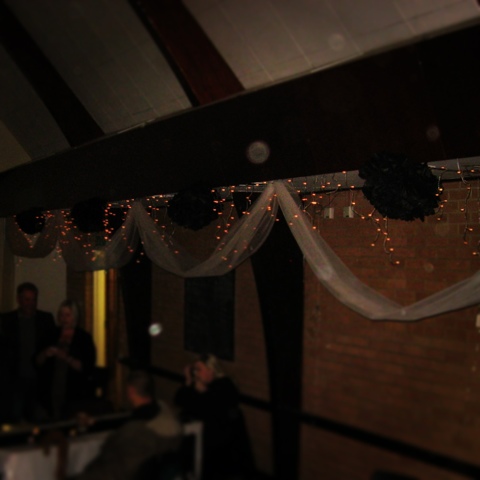
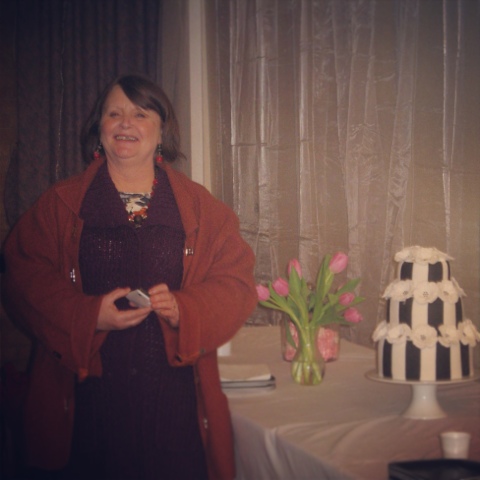
   My sweet wonderful husband worked like a trooper getting all the decorations up all by himself while Sis and I slaved away in the kitchen cooking up a feast! It is quite a task catering for so many people, I hope Lil' Miss has no plans of ever getting married! I don't think I could face something on this scale EVER AGAIN, maybe with a little more help...!


   If a buffet isn't great enough, getting to enjoy it 2 days in a row is pretty fabulous. There were 2 parties, of course! The first on Friday night and then the 'After Party' clearing up on the Saturday morning, in fact I think I enjoyed Saturday more as the pressure was finally off and my outfit was a darn sight more comfortable!We cranked up the music scoffed toasted cheese sandwiches, and cleared away all the goodness of the night before.

                        Phew so that was it. 3 months of work over and the effort was all worth it!
                         Mum I love you! And of course you only turn 60 once. Thank goodness!